7 Easy Yoga Poses for Beginners to Start Practicing at Home (Step-by-Step Guide)
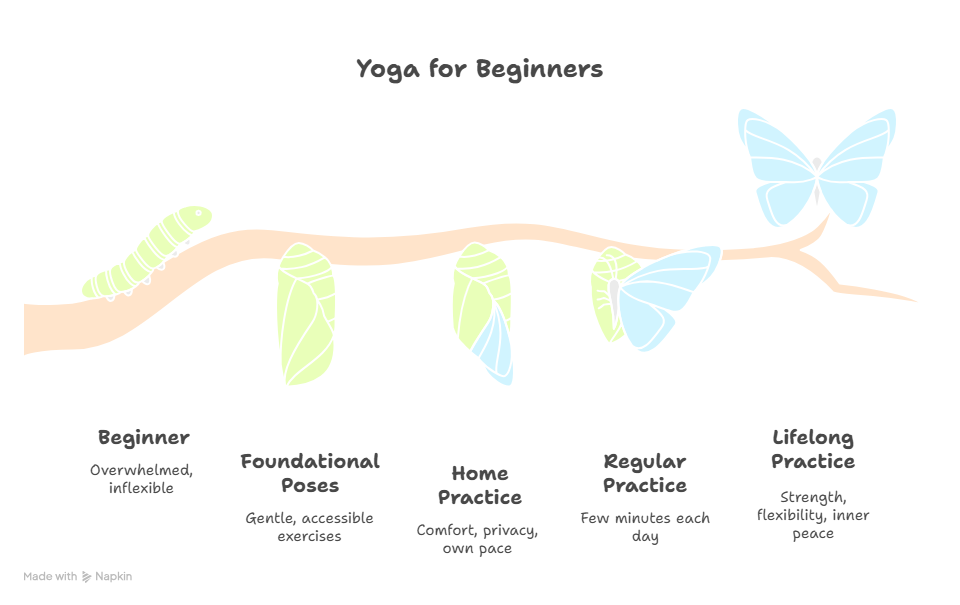
Starting a yoga journey can feel overwhelming, especially when you’re browsing through advanced poses that seem impossible to achieve. The good news is that Yoga Poses for Beginners are designed to be accessible, gentle, and incredibly effective for building strength, flexibility, and inner peace. You don’t need to be naturally flexible, have years of experience, or even step foot in a studio to begin reaping the benefits of this ancient practice.
Yoga offers remarkable benefits including stress relief, improved flexibility, better posture, and enhanced mental clarity. Whether you’re dealing with tight muscles from desk work, looking for a gentle way to stay active, or seeking a moment of calm in your busy day, these foundational poses will serve as your gateway to a lifelong practice. The beauty of starting Yoga for Beginners at home lies in the comfort and privacy it provides, allowing you to learn at your own pace without any pressure or comparison to others.
All you need is a yoga mat and a few minutes of your day to begin this transformative journey. Ready to discover how these seven essential poses can change your relationship with movement and mindfulness? Let’s explore the wonderful world of home yoga practice together.
Why Yoga for Beginners Should Start at Home
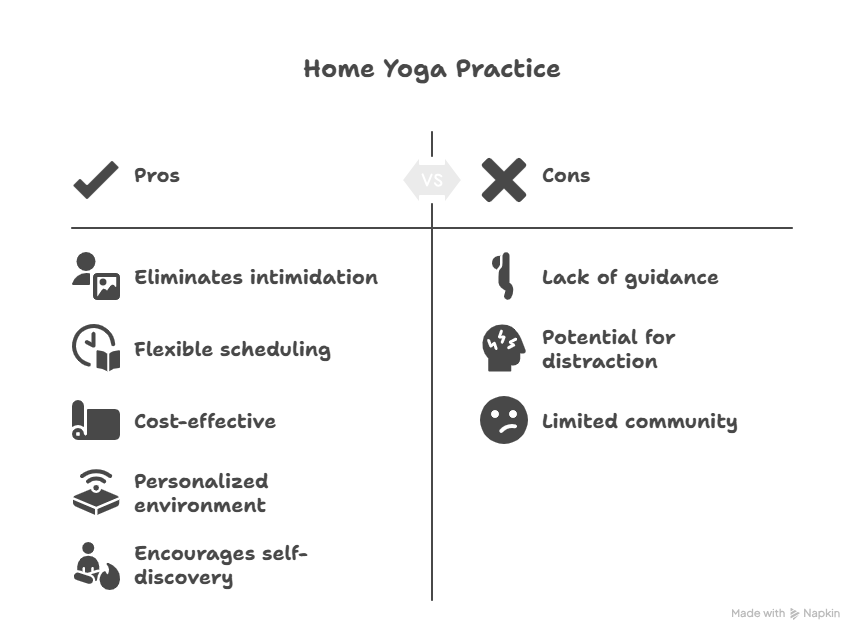
Beginning your yoga journey in the comfort of your own home offers unique advantages that make it the perfect starting point for newcomers. When you practice Yoga for Beginners at home, you eliminate the intimidation factor that many people experience in group classes. There’s no need to worry about keeping up with others or feeling self-conscious about your flexibility level.
The convenience factor cannot be overstated. Your home practice means no commuting to studios, no scheduling around class times, and no monthly membership fees. You can roll out your mat whenever it suits your schedule, whether that’s early morning before work, during a lunch break, or in the evening to unwind. This flexibility makes it much easier to establish a consistent routine, which is crucial for experiencing yoga’s full benefits.
Cost-effectiveness is another significant advantage of home practice. While studio classes can cost anywhere from $15 to $30 per session, your home practice requires minimal investment. A quality yoga mat, perhaps a few basic props, and access to online resources or books are all you need to get started. This makes yoga accessible to people of all economic backgrounds.
Home practice also allows for complete customization of your environment. You can control the temperature, lighting, and music to create the perfect atmosphere for your practice. Some days you might prefer energizing music and bright lighting, while other days call for dim lighting and calming sounds. This personalization helps create a deeper connection to your practice.
The privacy of home practice encourages experimentation and self-discovery. You can hold poses longer if they feel good, modify them as needed, or even create your own sequences. There’s no pressure to achieve perfect alignment immediately or to move at anyone else’s pace. This freedom allows you to truly listen to your body and develop body awareness, which is fundamental to yoga practice.
For beginners, home practice also provides the opportunity to repeat poses multiple times without feeling rushed. You can pause to check your alignment, review instructions, or simply rest when needed. This self-paced approach builds confidence and ensures proper form development from the beginning.
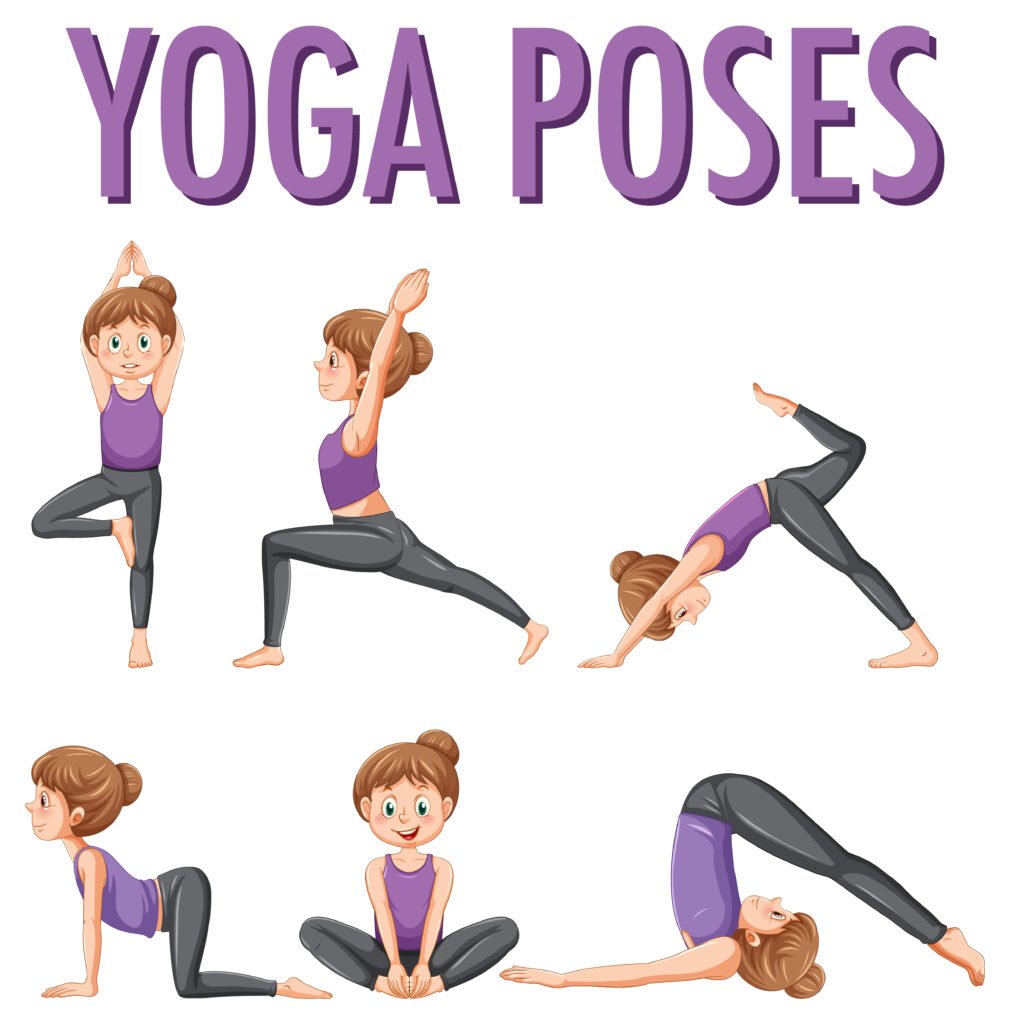
7 Easy Yoga Poses for Beginner to practice at home.
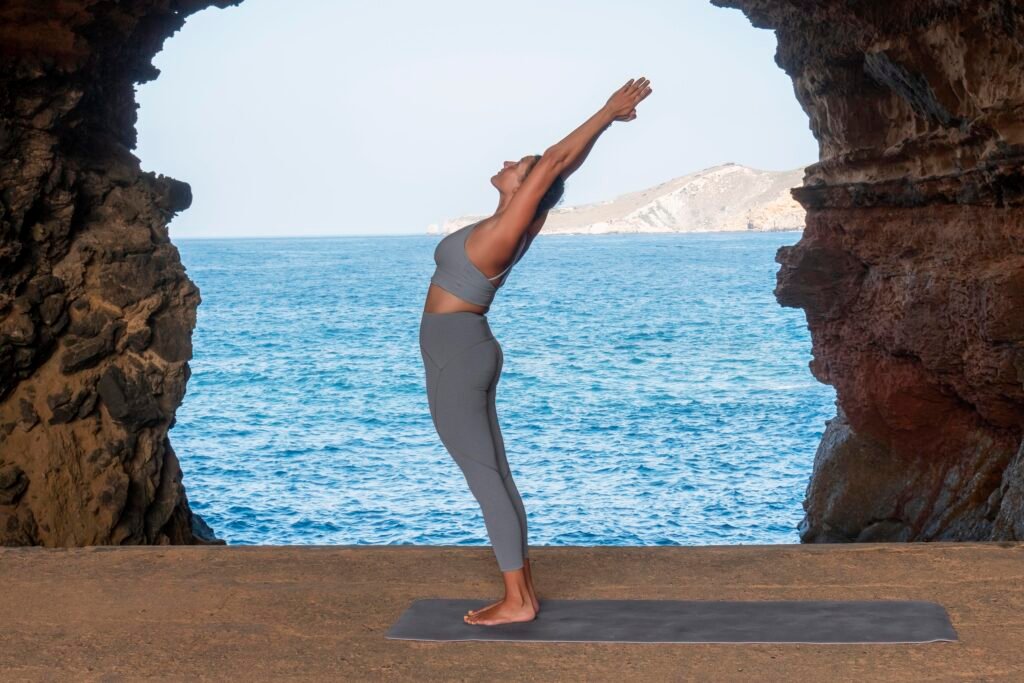
Mountain Pose (Tadasana)
Mountain Pose serves as the foundation for all standing poses and is often considered the most important pose in yoga. While it may appear simple, this pose teaches proper alignment and body awareness that carries into every other pose you’ll learn.
To practice Mountain Pose, stand with your big toes touching and heels slightly apart. Distribute your weight evenly across both feet, feeling all four corners of each foot grounded into the mat. Lift and spread your toes, then lower them back down to create a stable base. Engage your leg muscles by gently lifting your kneecaps, but avoid locking your knees.
Stack your pelvis directly over your legs, allowing your tailbone to lengthen toward the floor. Draw your lower ribs in slightly and lift through the crown of your head, creating length in your spine. Let your shoulders relax away from your ears and allow your arms to hang naturally at your sides with palms facing forward. This palm position opens your chest and shoulders.
The benefits of Mountain Pose extend far beyond its apparent simplicity. Regular practice improves posture by teaching proper spinal alignment and strengthening the muscles that support good posture throughout daily activities. It enhances body awareness, helping you notice and correct postural habits that may contribute to pain or discomfort.
Mountain Pose also serves as a moving meditation, promoting mental clarity and focus. As you stand in stillness, you learn to find stability and calm, qualities that translate into other yoga poses and life situations. The pose strengthens your legs, core, and back muscles while improving balance and coordination.
Practice Mountain Pose for 30 seconds to 1 minute, focusing on your breath and the sensation of being grounded yet lifted. Use this pose as a reset between other standing poses or whenever you need to center yourself during your practice.
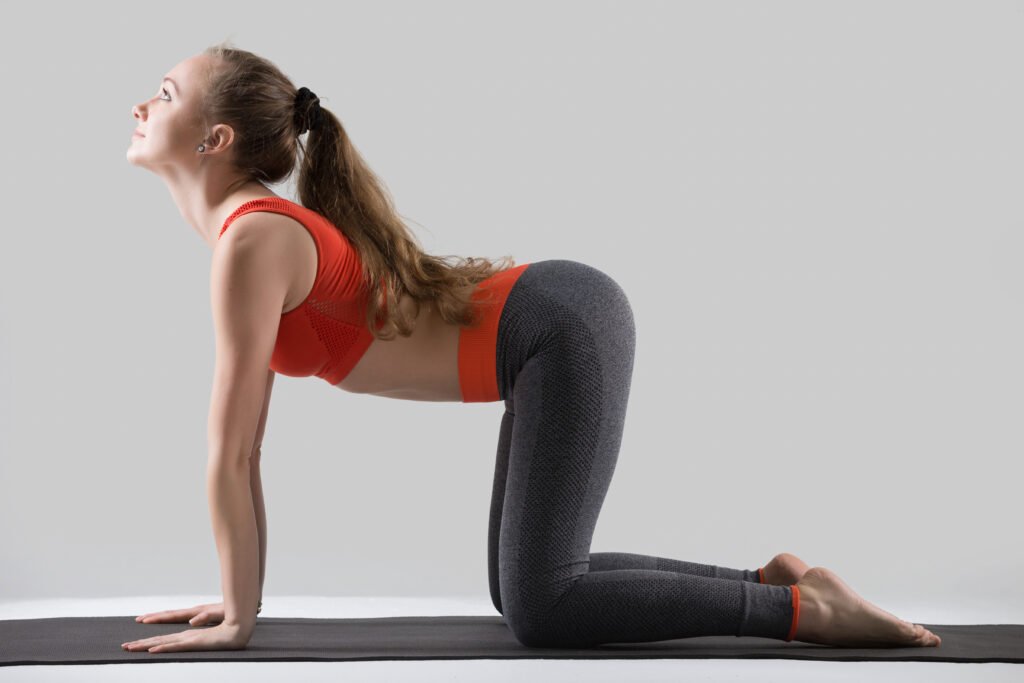
Cat-Cow Stretch (Marjaryasana-Bitilasana)
The Cat-Cow Stretch is a gentle, flowing movement that warms up the spine and introduces the concept of moving with breath, which is central to yoga practice. This dynamic pose combination helps release tension in the back and neck while improving spinal flexibility.
Begin on your hands and knees in a tabletop position. Place your wrists directly under your shoulders and your knees under your hips. Spread your fingers wide and press your palms firmly into the mat. Keep your neck in a neutral position, gazing down at the mat.
For Cow Pose, inhale as you drop your belly toward the mat, lift your chest and tailbone toward the ceiling, and gently lift your gaze. Create a gentle arch in your back, but avoid forcing the movement or straining your neck. Feel the stretch across your chest and the front of your torso.
For Cat Pose, exhale as you round your spine toward the ceiling, tuck your tailbone under, and draw your chin toward your chest. Press firmly through your hands and feel the stretch between your shoulder blades and along your entire spine.
Continue flowing between these two positions for 5-10 breaths, moving slowly and mindfully with each inhale and exhale. The rhythm should feel natural and soothing, like a gentle wave moving through your spine.
Cat-Cow Stretch offers numerous benefits for beginners. It loosens tight muscles in the upper and lower back, which is particularly beneficial for people who spend long hours sitting. The pose stretches the abdominals and hip flexors while opening the chest area, counteracting the forward head posture common in modern life.
This movement also builds strength in the wrists and arms while improving coordination between breath and movement. The gentle nature of Cat-Cow makes it an excellent warm-up pose and a safe way to explore spinal mobility. Many practitioners find this pose deeply relaxing and use it to release stress and tension at the end of a long day.
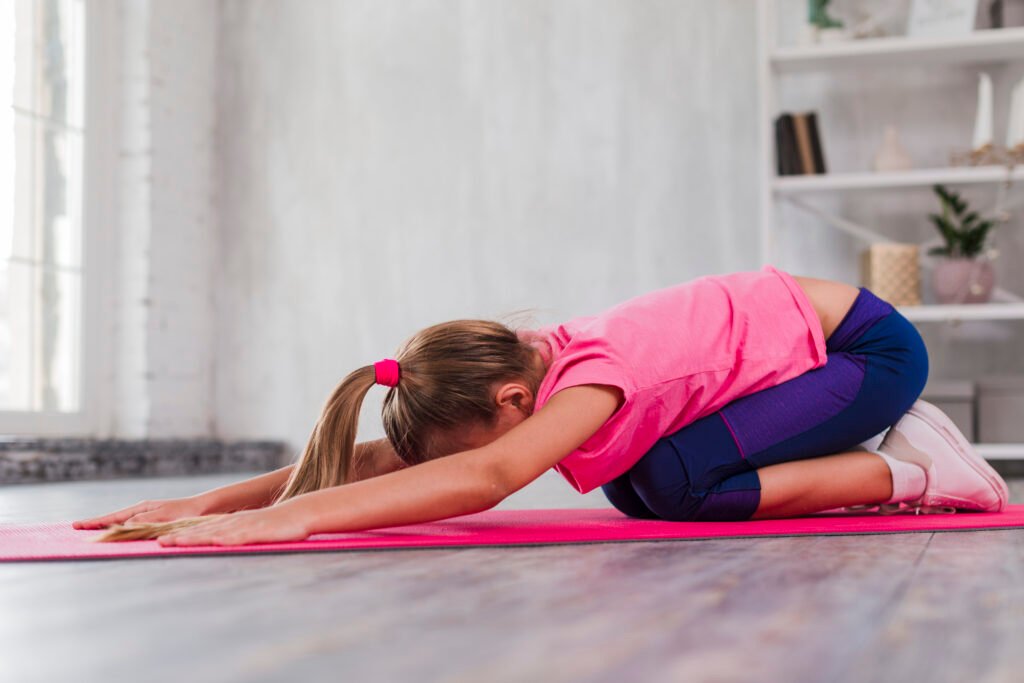
Child’s Pose (Balasana)
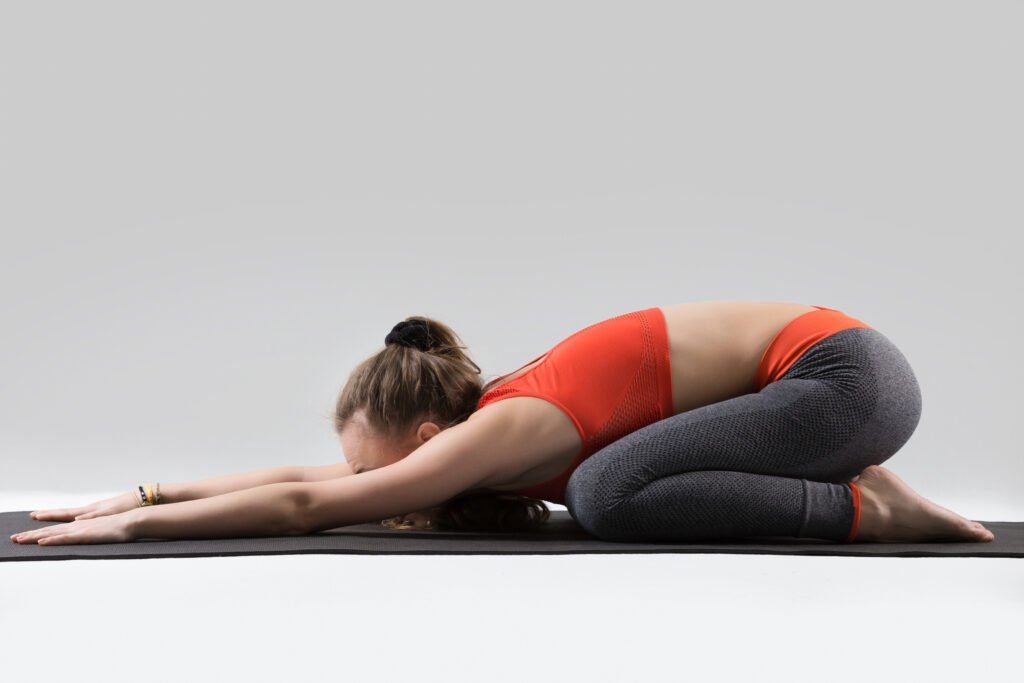
Child’s Pose is often called the most important pose in yoga because it provides a safe haven for rest and introspection during practice. This gentle resting pose activates the parasympathetic nervous system, promoting relaxation and stress relief.
To enter Child’s Pose, begin kneeling on your mat with your big toes touching and knees about hip-width apart. Sit back on your heels and slowly fold forward, bringing your forehead to rest on the mat. You can extend your arms forward with palms down, or relax them alongside your body with palms facing up.
If your forehead doesn’t comfortably reach the mat, place a pillow, block, or folded blanket under your forehead for support. If sitting back on your heels is uncomfortable, place a pillow or bolster between your calves and thighs. These modifications ensure you can hold the pose comfortably for several minutes.
Breathe deeply and slowly in Child’s Pose, allowing each exhale to help you sink deeper into relaxation. Focus on the gentle stretch in your hips, thighs, and ankles, and notice how the pose naturally encourages inward reflection.
The benefits of Child’s Pose are both physical and mental. Physically, it gently stretches the hips, thighs, and ankles while relieving tension in the back, neck, and shoulders. The pose can help lower blood pressure and promote better digestion by gently massaging the abdominal organs.
Mentally, Child’s Pose provides a sense of security and grounding. It’s an excellent pose for managing anxiety or overwhelm, as the inward folding naturally turns attention inward and away from external stressors. Many practitioners use Child’s Pose as a moment to set intentions for their practice or to simply reconnect with their breath.
Child’s Pose can be held for anywhere from 30 seconds to several minutes. Use it whenever you need a break during your practice, or as a way to end your session with a few moments of peaceful reflection.
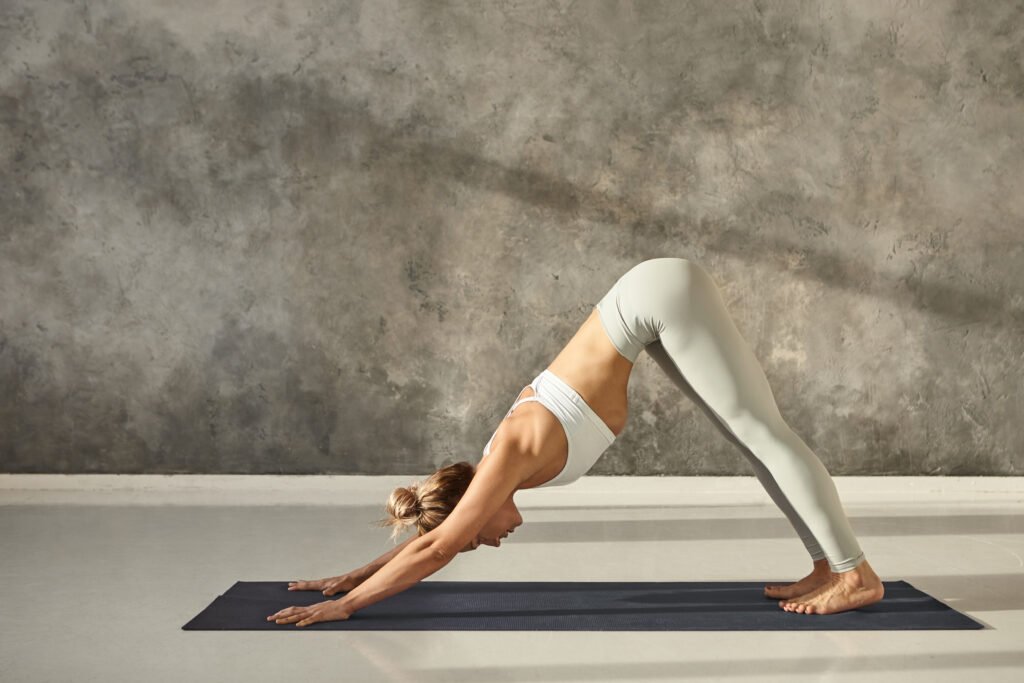
Downward-Facing Dog (Adho Mukha Svanasana)
Downward-Facing Dog is one of the most recognizable yoga poses and serves as a foundational pose that appears in many yoga sequences. While it may look simple, this pose provides a full-body stretch and strengthening experience that benefits practitioners of all levels.
Start in a tabletop position with your hands and knees on the mat. Tuck your toes under and lift your hips up and back, straightening your legs and creating an inverted V-shape with your body. Your hands should be shoulder-width apart with fingers spread wide, and your feet should be hip-width apart.
Press firmly through your palms and lift your hips toward the ceiling. Work on straightening your legs, but don’t worry if your heels don’t touch the ground initially. Focus on creating length in your spine by reaching your tailbone toward the ceiling and your chest toward your thighs.
Keep your head in a neutral position between your arms, avoiding the temptation to look forward or let your head hang heavily. Your ears should be level with your upper arms, and your gaze should be directed toward your feet or between your legs.
If you’re new to this pose, you can modify it by keeping a slight bend in your knees or by placing your hands on blocks to reduce the intensity. You can also practice against a wall, placing your hands on the wall at hip height and walking your feet back to create the inverted V-shape.
Downward-Facing Dog offers incredible benefits for the entire body. It stretches the hamstrings, calves, and Achilles tendons while strengthening the arms, shoulders, and core muscles. The pose also provides a gentle inversion, which can help improve circulation and energize the body.
Regular practice of Downward-Facing Dog can help alleviate back pain by strengthening the muscles that support the spine and stretching tight hip flexors and hamstrings. The pose also helps improve posture by opening the chest and shoulders, counteracting the effects of prolonged sitting.
Hold Downward-Facing Dog for 30 seconds to 1 minute, breathing deeply and evenly throughout. As you build strength and flexibility, you’ll find this pose becomes more comfortable and energizing.
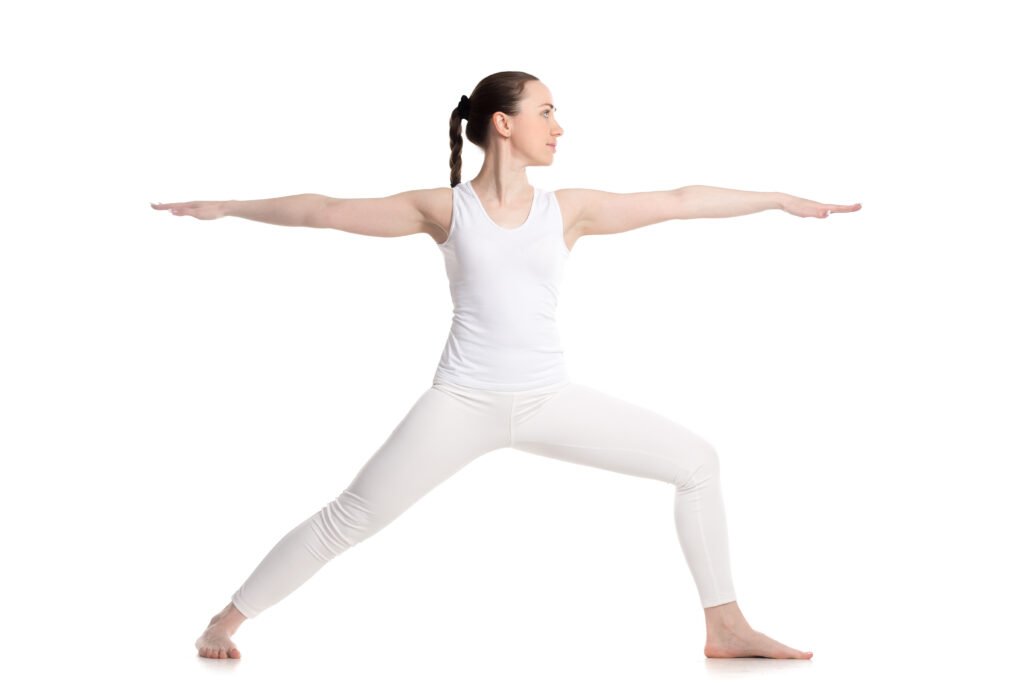
Warrior II (Virabhadrasana II)
Warrior II is a powerful standing pose that builds strength, stability, and confidence while teaching proper alignment principles that apply to many other yoga poses. This pose embodies the warrior spirit of strength and determination while maintaining a sense of ease and grace.
Begin in Mountain Pose at the front of your mat. Step your left foot back about 3-4 feet, turning it out at a 45-degree angle. Your front foot should point straight ahead, and your back foot should be parallel to the back edge of your mat.
Bend your right knee directly over your right ankle, working toward creating a 90-degree angle in your front leg. Keep your right thigh parallel to the floor if possible, but don’t force it. Your back leg should remain straight and strong.
Extend your arms parallel to the floor, reaching actively through your fingertips. Your right arm reaches over your right leg, and your left arm reaches over your left leg. Keep your shoulders directly over your hips and avoid leaning forward or backward.
Turn your head to gaze over your right fingertips, keeping your neck long and relaxed. Hold the pose for 30 seconds to 1 minute, then repeat on the other side.
If you find it challenging to maintain the pose, you can place a block under your front thigh for support or reduce the depth of your front knee bend. You can also practice with your back against a wall for additional stability.
Warrior II offers numerous benefits for beginners. It strengthens the legs, particularly the quadriceps and glutes, while improving hip flexibility and mobility. The pose also strengthens the core muscles and improves overall stability and balance.
Beyond the physical benefits, Warrior II builds mental strength and confidence. The pose requires focus and determination to maintain proper alignment while breathing calmly. Many practitioners find that regular practice of Warrior II helps them feel more grounded and confident in their daily lives.
The pose also teaches the important yoga principle of finding ease within effort. While Warrior II requires strength and engagement, it should never feel forced or strained. Learning to find this balance is a valuable skill that extends beyond the yoga mat.
Tree Pose (Vrikshasana)
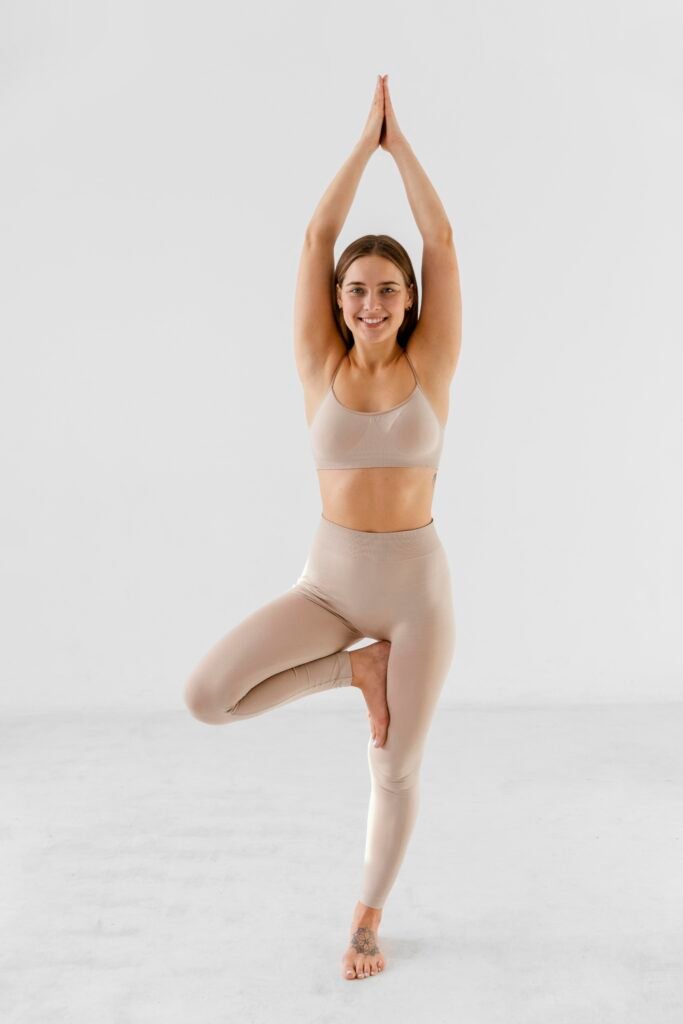
Tree Pose is a beautiful balancing pose that teaches focus, concentration, and the art of finding stability while standing on one leg. This pose connects you to the grounding energy of trees while building physical and mental balance.
Begin in Mountain Pose with your feet hip-width apart. Shift your weight onto your left foot and slowly lift your right foot off the ground. Place your right foot on the inside of your left leg, either above or below the knee, but never directly on the knee joint.
If placing your foot on your leg is challenging, you can keep your right toe on the ground and rest your right heel against your left ankle. Alternatively, you can place your foot on your calf muscle for a more stable variation.
Once you’ve found your foot placement, press your foot into your leg and your leg into your foot to create stability. Bring your hands to your heart center in prayer position, or extend them overhead like the branches of a tree.
Find a focal point (called a “drishti” in yoga) at eye level and gaze steadily at it to help maintain your balance. Breathe deeply and evenly, allowing your breath to help you find stability in the pose.
If you’re struggling with balance, you can practice Tree Pose with your back against a wall or keep one hand on a chair or wall for support. Remember that balance poses are different every day, and even experienced practitioners sometimes wobble or fall out of the pose.
Tree Pose offers unique benefits for both body and mind. Physically, it strengthens the standing leg, improves ankle stability, and enhances proprioception (your body’s awareness of its position in space). The pose also helps improve posture and core strength.
Mentally, Tree Pose teaches patience, focus, and acceptance. Balancing requires present-moment awareness and the ability to make small adjustments without becoming frustrated. Many practitioners find that Tree Pose helps them develop a sense of inner calm and stability that they can access during stressful situations.
The pose also connects you to the natural world and the grounding energy of trees. Like a tree, you learn to find stability through your roots (your standing leg) while allowing movement and flexibility in your branches (your arms and upper body).
Hold Tree Pose for 30 seconds to 1 minute on each side, remembering that it’s perfectly normal for your balance to vary from day to day or even from side to side.
Seated Forward Bend (Paschimottanasana)
Seated Forward Bend is a calming, introspective pose that provides a deep stretch for the entire back body while promoting relaxation and stress relief. This pose teaches patience and the art of surrendering into a stretch rather than forcing it.
Sit on your mat with your legs extended straight in front of you, feet flexed and hip-width apart. If sitting with straight legs is uncomfortable, place a folded blanket or pillow under your hips to elevate them slightly, or keep a slight bend in your knees.
Place your hands on the mat beside your hips and press down to lengthen your spine. Take a deep breath and lift through the crown of your head, creating as much length as possible in your torso.
On an exhale, begin to hinge forward from your hips, keeping your spine long and your chest open. Reach your hands toward your feet, but don’t worry about how far you can reach. The goal is to maintain length in your spine rather than to touch your toes.
If you can comfortably reach your feet, you can hold your big toes with your first two fingers and thumbs, or clasp your hands around the soles of your feet. If you can’t reach your feet, rest your hands on your shins, ankles, or wherever they naturally fall.
Avoid rounding your back or forcing the forward fold. Instead, focus on breathing deeply and allowing gravity to gently deepen the stretch with each exhale. Hold the pose for 1-3 minutes, breathing slowly and evenly.
If you have tight hamstrings or lower back issues, you can modify this pose by sitting on a blanket or pillow, keeping a bend in your knees, or using a strap around your feet to help you maintain proper alignment.
Seated Forward Bend offers numerous benefits for both body and mind. Physically, it provides a deep stretch for the hamstrings, calves, and entire back body. The pose can help relieve tension in the spine and may alleviate mild back pain when practiced regularly.
The forward folding action naturally calms the nervous system and can help reduce stress, anxiety, and mild depression. Many practitioners find this pose deeply meditative and use it as a way to turn inward and reflect.
Seated Forward Bend also teaches the important lesson of non-attachment and patience. Rather than striving to achieve a certain depth in the pose, you learn to accept where you are today and trust that flexibility will develop over time with consistent practice.
Easy Yoga Poses for Beginners: Safety Tips for Home Practice
Practicing yoga safely at home requires attention to proper alignment, listening to your body, and creating an appropriate environment for your practice. These safety guidelines will help you build a sustainable and injury-free yoga practice.
The most important principle in yoga is to never push beyond your comfortable limits. Yoga should never cause sharp pain or discomfort. While you may feel mild stretching sensations or muscle engagement, any sharp, shooting, or intense pain is a signal to back off immediately. Remember that flexibility and strength develop gradually over time, and forcing poses can lead to injury.
Proper alignment is crucial for safe practice. Take time to understand the correct alignment for each pose before attempting it. Use mirrors if available to check your form, or practice in front of a camera to review your alignment later. When in doubt, err on the side of caution and use modifications or props to support proper alignment.
Maintaining steady, deep breathing throughout your practice is essential. If you find yourself holding your breath or breathing rapidly, it’s a sign that you’re pushing too hard. Your breath should remain calm and controlled throughout your practice. If you can’t maintain steady breathing in a pose, ease up or come out of the pose entirely.
Joint alignment deserves special attention, particularly in weight-bearing poses. Keep a slight bend in your joints to prevent locking, especially in your knees and elbows. When practicing poses like Downward-Facing Dog or arm balances, avoid putting excessive weight on your wrists by distributing weight evenly across your entire hand.
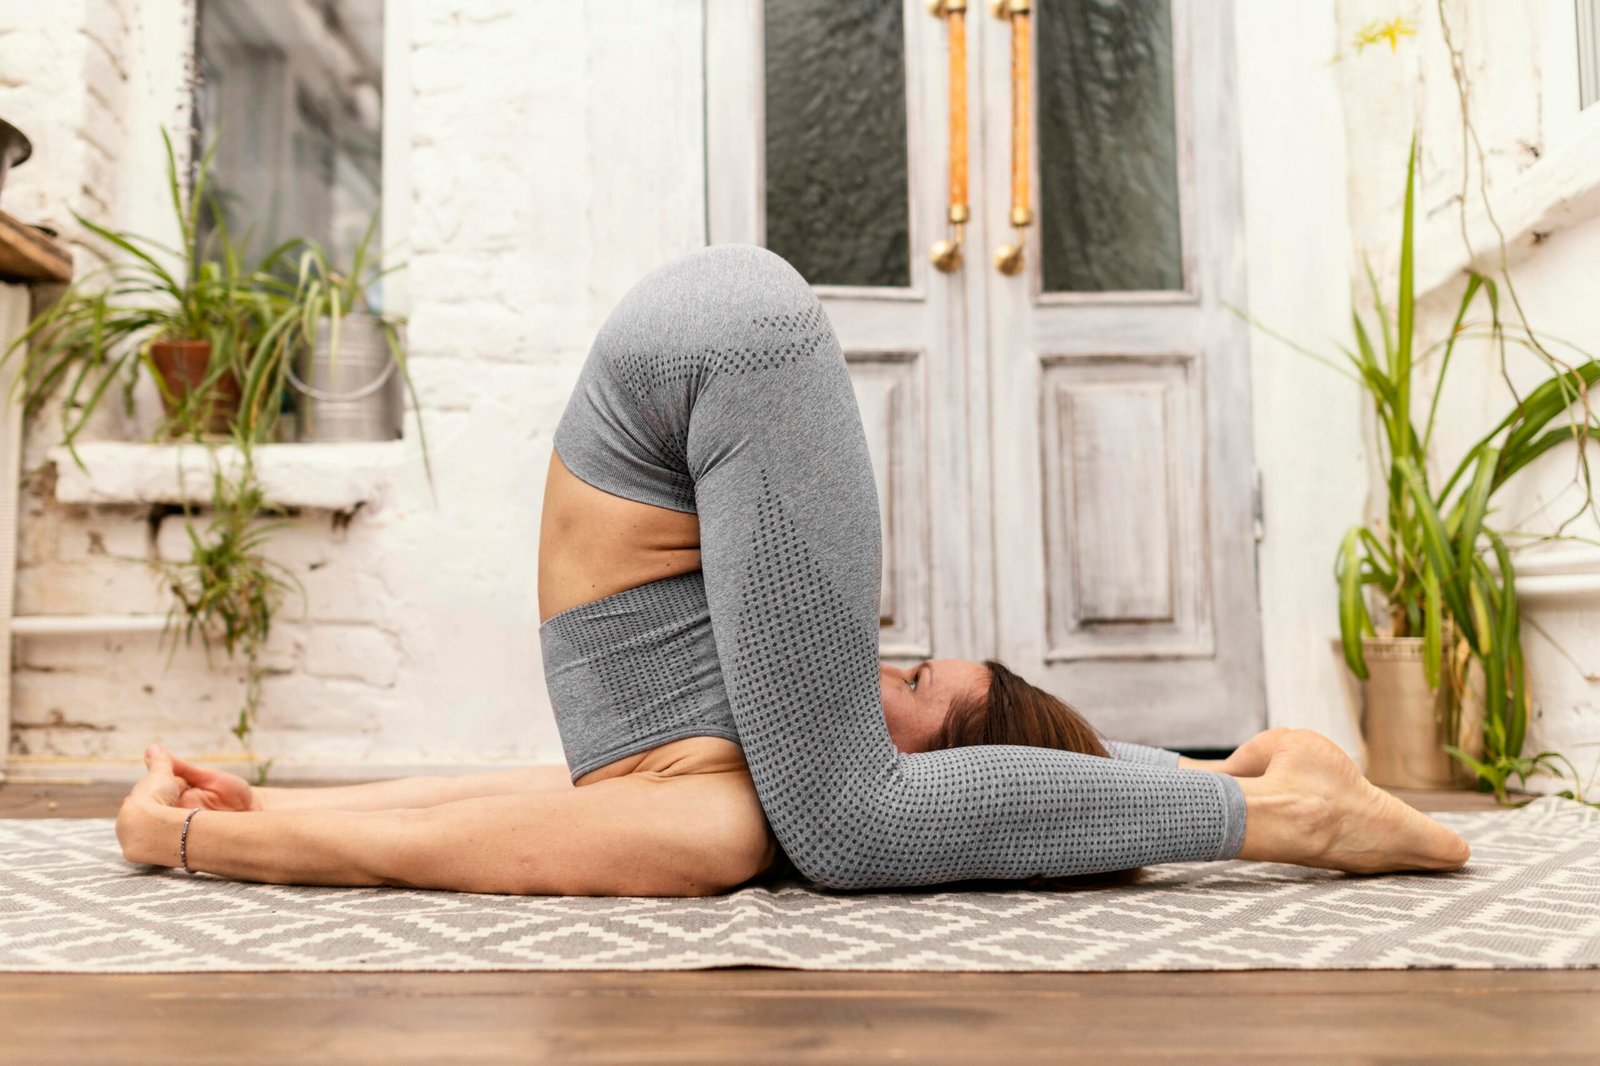
Your neck requires careful attention in many yoga poses. Avoid putting weight on your neck in poses like Shoulder Stand or Plow Pose until you have sufficient experience and strength. In poses like Downward-Facing Dog, keep your head in a neutral position rather than looking forward or letting it hang heavily.
Core engagement is crucial for protecting your lower back in many poses. Learn to gently engage your abdominal muscles to support your spine, especially in backbends and twisting poses. This doesn’t mean creating tension, but rather finding a supportive activation that protects your back.
Creating a safe practice environment is equally important. Ensure you have adequate space to move freely without hitting furniture or walls. Practice on a non-slip surface, preferably a yoga mat, to prevent slipping. Keep the room at a comfortable temperature and ensure good ventilation.
Consistency trumps intensity in yoga practice. It’s better to practice for 15-20 minutes daily than to do an intense 90-minute session once a week. Regular, gentle practice allows your body to adapt gradually and reduces the risk of injury while building sustainable habits.
Listen to your body’s signals and respect its limitations. Some days you may feel energetic and flexible, while other days you may feel stiff or tired. Adjust your practice accordingly, choosing gentler poses on days when your body feels less receptive to movement.
If you have any pre-existing injuries or health conditions, consult with a healthcare provider before beginning a yoga practice. Certain poses may need to be modified or avoided entirely depending on your individual circumstances.
Recommended Yoga Gear for Beginners
Starting a home yoga practice doesn’t require expensive equipment, but having the right basic gear can significantly enhance your comfort, safety, and enjoyment of yoga. Here’s a guide to essential and optional equipment for beginners.
A quality yoga mat is your most important investment. Look for a mat that provides adequate cushioning for your joints while offering good traction to prevent slipping. Standard yoga mats are about 1/8 inch thick, but beginners may prefer slightly thicker mats (up to 1/4 inch) for extra cushioning, especially if you have sensitive knees or practice on hard floors.
Want to know which yoga mat is best for beginners? Read our full yoga mat review on the blog
Natural rubber mats tend to provide better grip than PVC mats, especially as you begin to sweat during practice. However, if you have latex allergies, choose a synthetic mat made from TPE or other latex-free materials. The mat should be long enough to accommodate your full body length when lying down, typically 68-72 inches for most people.
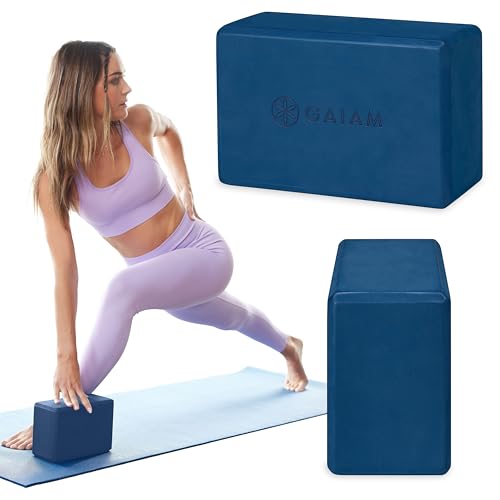
Yoga blocks are incredibly useful props for beginners. These foam, cork, or wooden blocks can be used to bring the floor closer to you in poses where you can’t quite reach, such as seated forward bends or standing poses. They can also provide support under your hips in seated poses or under your hands in poses like Low Lunge.
A yoga strap is another valuable prop that helps extend your reach and maintain proper alignment. Use straps in seated forward bends if you can’t reach your feet, or in shoulder stretches to maintain proper alignment when your shoulders are tight. Straps are particularly helpful for people with limited flexibility who want to practice safely while building flexibility over time.
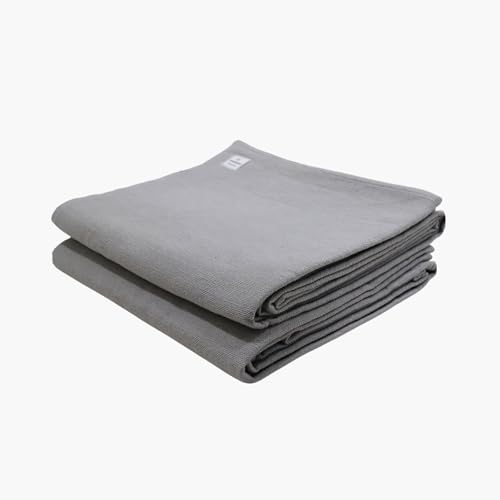
Blankets serve multiple purposes in yoga practice. They can provide extra cushioning under your knees in poses like Child’s Pose, warmth during relaxation poses, or support under your hips in seated poses. Choose a blanket that’s not too thick or bulky, as you’ll want to fold it easily for different uses.
A bolster is a firm, cylindrical pillow that provides excellent support in restorative poses and can make seated poses more comfortable. While not essential for beginners, bolsters can significantly enhance your comfort in longer-held poses and meditation.
Comfortable, appropriate clothing is crucial for a good yoga practice. Choose form-fitting but not restrictive clothing that allows you to move freely and won’t ride up or shift during poses. Avoid clothing that’s too loose, as it can get in the way during inversions or arm balances.
For women, a supportive sports bra is essential, especially for more active practices. Choose one that provides adequate support without restricting your breathing or movement. For both men and women, moisture-wicking fabrics can help keep you comfortable during more vigorous practices.
Consider keeping a hair tie or headband handy if you have longer hair. Nothing disrupts a peaceful practice quite like constantly having to push hair out of your face during poses.
While not essential, a yoga towel can be helpful if you tend to sweat during practice or if you’re practicing hot yoga. These towels are designed to provide grip even when wet and can be placed over your mat for extra traction.
Optional equipment that some beginners find helpful includes resistance bands for strength-building exercises, a yoga wheel for backbends and balance challenges, and a mat bag or sling for easy transport if you plan to take your practice outdoors or to different locations.
Remember that you don’t need to purchase everything at once. Start with a good mat and perhaps one or two props, then add to your collection as you discover what enhances your practice. Many household items can substitute for yoga props initially – pillows can replace bolsters, towels can substitute for straps, and books can work as blocks.
The most important thing is to start practicing with whatever you have available. While proper equipment can enhance your practice, it’s not a prerequisite for beginning your yoga journey.
Final Thoughts: Beginning Your Yoga Journey
Starting a yoga practice is one of the most rewarding gifts you can give yourself. These seven Easy Yoga Poses for Beginners provide a solid foundation for building strength, flexibility, and inner peace from the comfort of your own home. Remember that yoga is not about achieving perfect poses or competing with others – it’s about connecting with your body, breath, and inner wisdom.
Every expert was once a beginner, and every yoga practitioner continues to learn and grow throughout their journey. Some days your Tree Pose will feel rock-steady, while other days you might wobble or fall out of it entirely. This variability is completely normal and part of the beautiful, humbling nature of yoga practice.
The key to success in yoga is consistency rather than perfection. Even five minutes of daily practice will yield more benefits than an occasional longer session. Start small, be patient with yourself, and celebrate the small victories along the way. Notice how you feel after practicing these poses – perhaps you stand a little taller, breathe a little deeper, or feel more centered and calm.
As you become more comfortable with these foundational poses, you’ll naturally want to explore more challenging poses and longer sequences. This is the perfect time to consider taking classes, either online or in person, to deepen your understanding and learn new poses safely.
Your yoga practice will evolve as you do. What serves you today may be different from what you need next month or next year. Stay curious, remain open to learning, and trust that your practice will guide you toward what you need most.
Most importantly, remember that yoga extends far beyond the physical poses. The breath awareness, mindfulness, and inner peace you cultivate on your mat will naturally flow into your daily life, helping you navigate challenges with greater ease and find moments of calm in busy days.
Take a moment right now to try one of these poses. Whether it’s the grounding stability of Mountain Pose or the gentle release of Child’s Pose, give yourself the gift of a few mindful breaths and movement. Your body and mind will thank you for it.
Ready to start your yoga journey? Begin with just one pose today, and remember that every step forward, no matter how small, is progress worth celebrating. Your mat is waiting, and your practice is calling.
